Step 1
Proxmox foundation
Installed Proxmox on bare metal, corrected the subnet mismatch, and established a stable wired connection so the hypervisor could function properly as a real server instead of a temporary desktop setup.
Project Case Study
I built the foundation of a home SOC lab on a dedicated machine using Proxmox as the hypervisor and Wazuh as the SIEM. The goal was not just to get software installed. It was to build a segmented environment, troubleshoot the infrastructure issues that came up, and end with a working dashboard I can continue expanding with attacker, victim, and detection work.
Project Progression
This lab is being built in stages. Version 1 focused on the Proxmox and Wazuh foundation. Version 2 expands the lab with monitored Linux and Windows endpoints, controlled test events, and Wazuh alert validation.
Proxmox, segmented networking, Wazuh installation, dashboard access, and initial troubleshooting.
Current PageUbuntu and Windows 10 agents connected to Wazuh, controlled test events generated, and alerts reviewed in the dashboard.
View Version 2Build a practical SOC lab environment that I can keep expanding over time. Version 1 focused on getting the core infrastructure in place: Proxmox, segmented networking, a Wazuh server, and a working dashboard. The point was to establish a real foundation first instead of trying to overbuild everything at once.
This part mattered just as much as the final install. The project did not work cleanly on the first try, which made it more useful. I had to troubleshoot the environment the way I would on a real system instead of just following a guide blindly.
--ignore-check.This project shows more than software installation. It shows that I can work through infrastructure problems, fix networking, verify services, and document what happened clearly. That is the kind of work I want to keep building on as I expand the lab into a fuller SOC environment with monitored endpoints, attack simulation, and incident documentation.
Build Breakdown
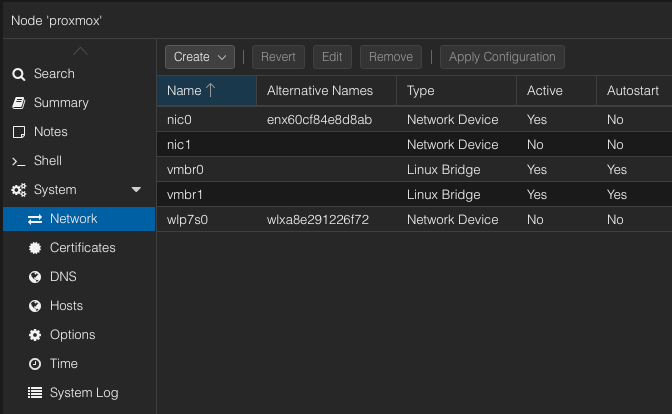
The lab was designed around a simple structure: one bridge for real access and one bridge for isolated internal traffic. That gives me a clean base to add monitored endpoints and attacker systems next.
Step 1
Installed Proxmox on bare metal, corrected the subnet mismatch, and established a stable wired connection so the hypervisor could function properly as a real server instead of a temporary desktop setup.
Step 2
Built vmbr0 for management and internet traffic and vmbr1 for the isolated lab. This keeps the project clean and makes later victim and attacker machines easier to separate.
Step 3
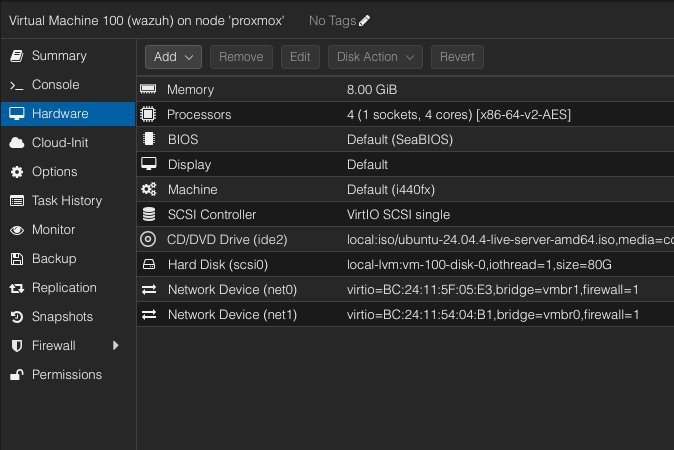
Created a dedicated Ubuntu Server VM with dual NICs so it could talk to the internal lab while still being reachable for dashboard access and package installation.
Step 4
Solved NIC, DNS, and installer issues, verified running services, and confirmed that the dashboard was available and usable from the browser.
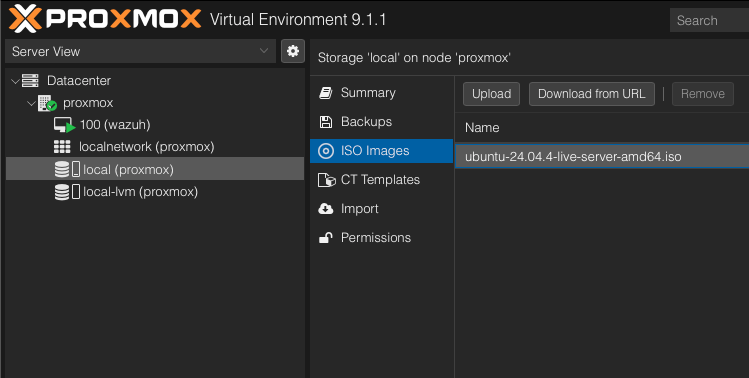
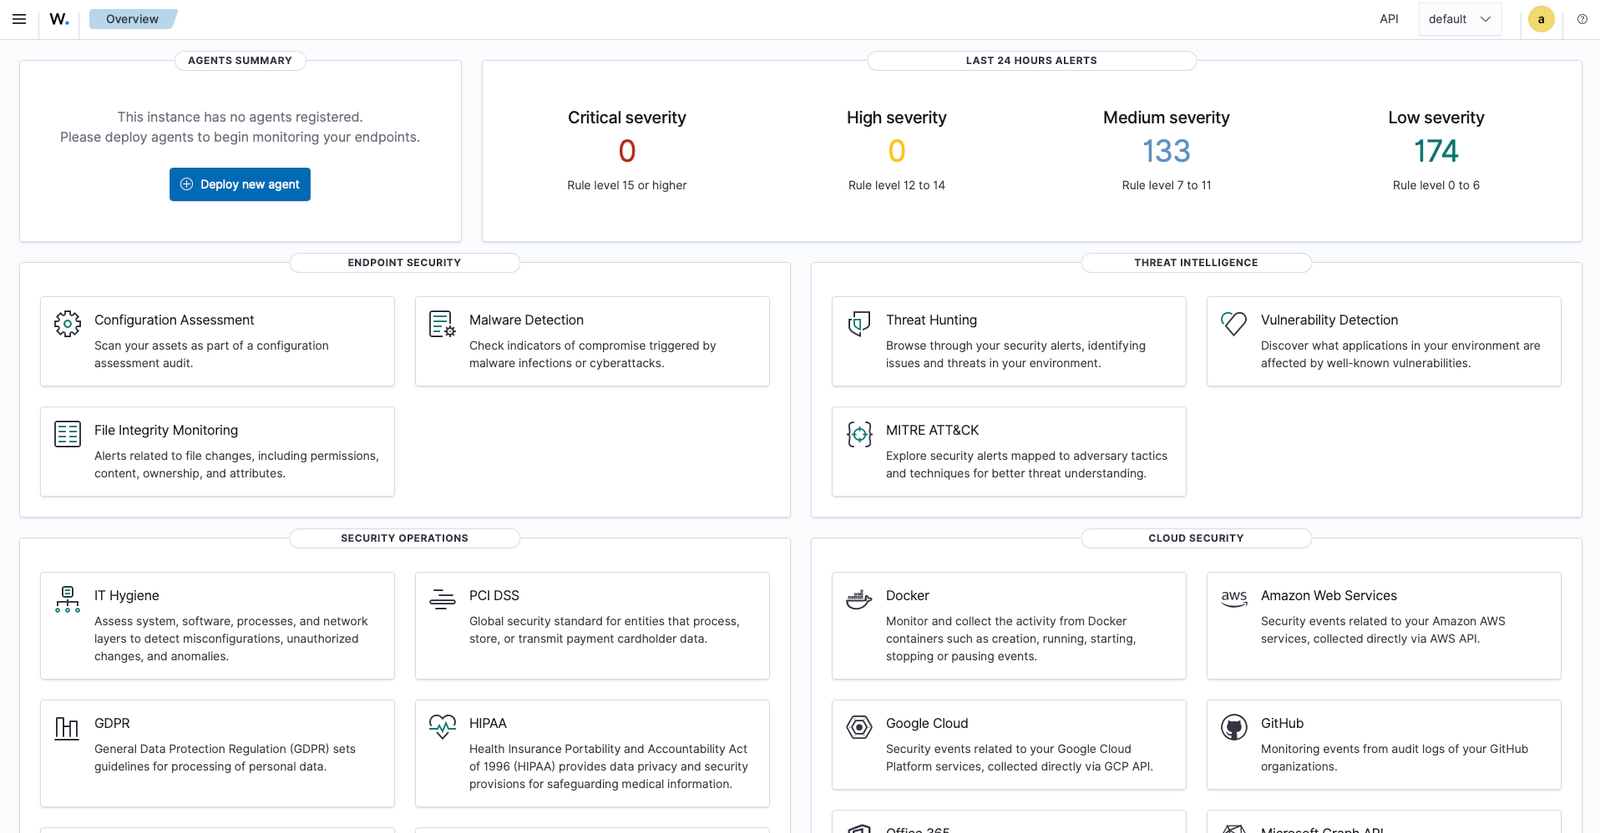
Evidence
These screenshots show the network setup, Ubuntu ISO upload, Wazuh VM hardware configuration, and final Wazuh login and dashboard access.
Next Stage
Add a monitored Ubuntu endpoint and register it with Wazuh as an agent.
Deploy a Kali VM inside the isolated network for controlled lab testing.
Begin attack simulation, log collection, and incident reporting based on actual lab events.